This post contains affiliate links and we earn small commission when you purchase through links with no additional cost to you. As Amazon Associate we earn from qualifying purchases. Click here for disclaimer policy.


Supplies:
- Templates: Download Below
- Turkey Tail Feathers
- Turkey Body
- Name Cards
- Recollection Cardstock Paper, Spice Market
- White cardstock.
- Red String
- Index Card or Place Card Holders
- Printer
- Googly Eyes 6mm
- Glue
- Leaf Hole Punchers-small size (optional)
- Scissors
- Exacto Knife
- Red Glitter
- Paper Trimmer (optional)
I made these invitations for Thanksgiving back in 2016 before my daughter was born. I did about 35 of them and mostly free hand using protractors, compass, and ruler. Since then we had a few additions to the family. I had to go back and figure out how I did these were made. In the process, I created these templates and tried them on and simplified where I could.
The amount of work required depends on how many you are making. If you have a large guest list, maybe you use these for the buffet table or for smaller groups dinners during the month. These are my favorites. If they appear to be too much work, I have easier less effort ones too.
I have also tried to give you tips and options for making them easier. Give them a try.
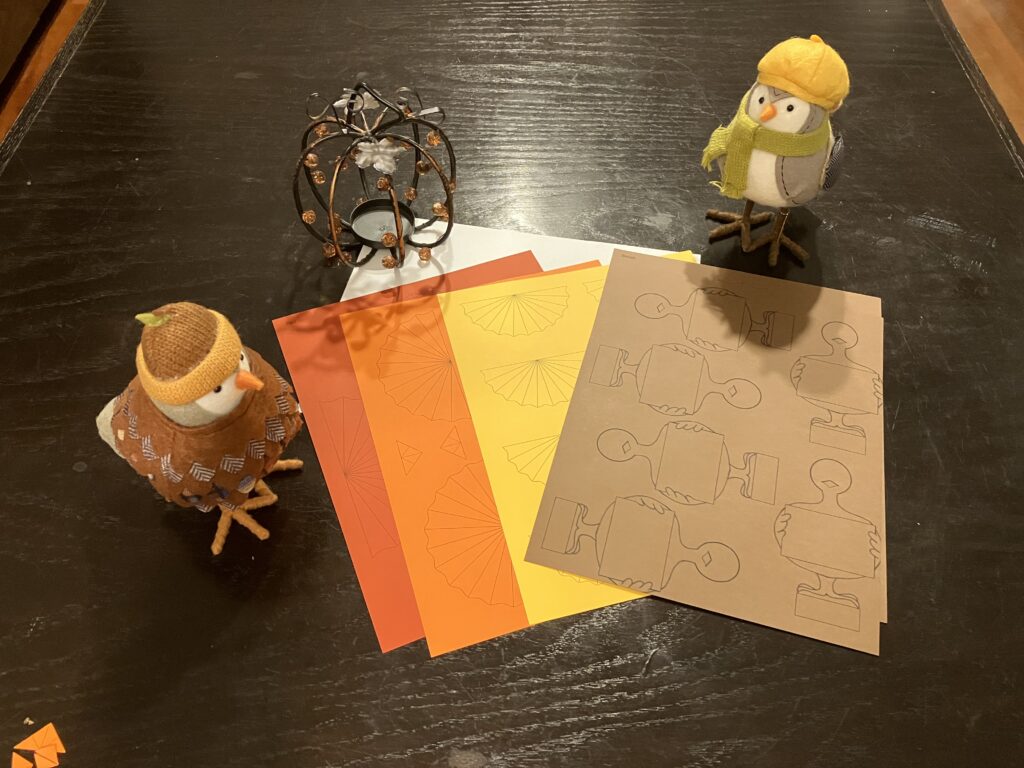
Step 1. Download and Print Template.
First, download the template on this page and print the sheets to the Recollection Card Stock Paper. Each page will need to be printed to a different color card stock. The colors I used are indicated on top right of the pages and the key below:
Brown—Largest wings (page 1).
Red—Next largest wing (page 2).
Orange—Third largest wing and beak (page 3).
Yellow—Smallest wing (page 4).
Brown—Turkey Body (page 5).
White—Name Cards (page 6).
Options: You do not have to follow the colors I have designated. If you like another color scheme better, use it. I prefer to write the names cards by hand, but you could use fonts found on the computer for these. In that case, add the names before printing the last sheet.
Tips: Print without borders. If your printer does not allow this, use alternate turkey template. Most of the other templates should not be affected by this. I used 1/2″ borders on the other templates.
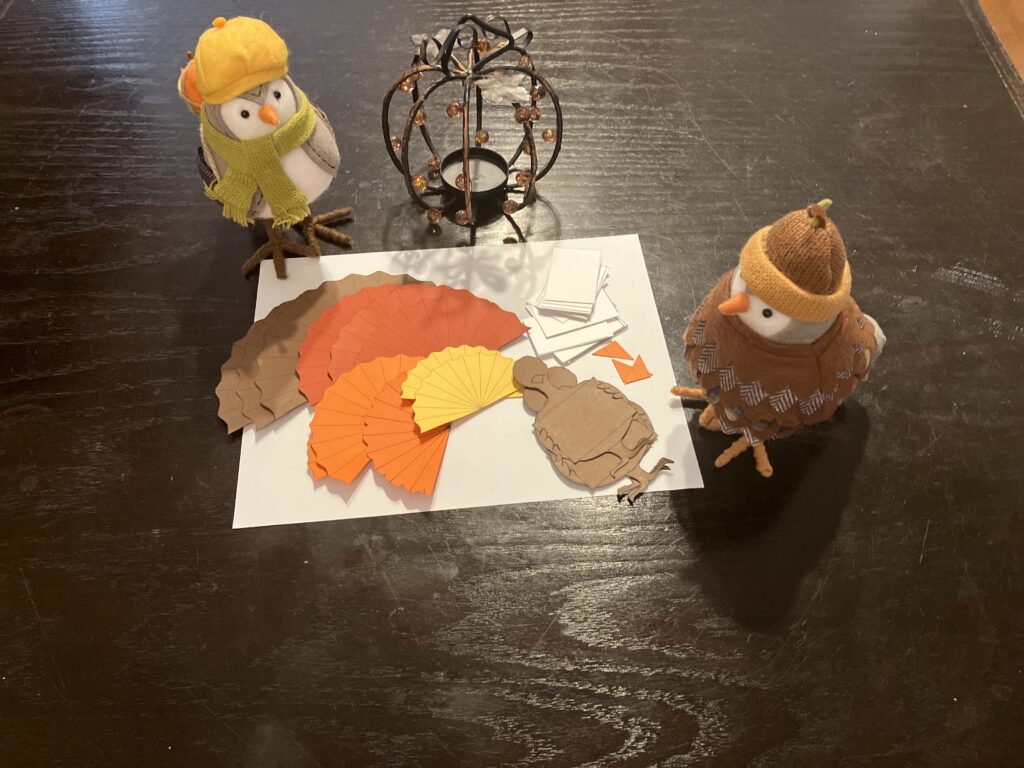
Step 2. Cut Feathers, turkey, turkey beaks and name cards.
After printing the templates, we will cut out the shapes. You can use scissors for the most part, but you will have to use an exacto knife to cut around the turkey fingers. This part it the most tedious! However, it adds the finish touch to it. If you want to skip this part and place the name cards directly on top, please go right ahead. No worries. Make this fun.
Make sure you also cut the orange triangles on the orange sheet.
Tips: Using a paper trimmer on the straight edges will make it easier. I created the templates to allow for this.
Depending on the age of your kids, they can help with cutting with the exception of using exacto.
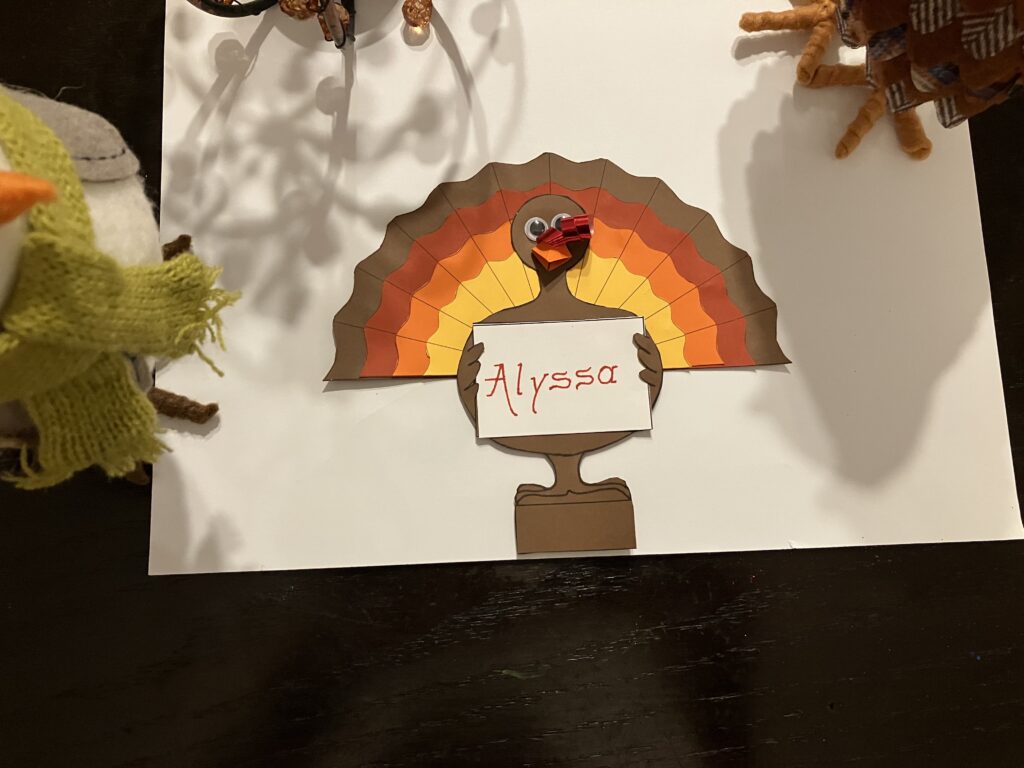
Step 3. Create the name cards
Next, create the name cards. It will be easier to do this step prior to assembling the turkey. You can also add some personal touches to these. If you have the leaf hole punch, you can place leaves in different autumn colors and place around the names. You could also use gold leaves as well.
Options: You can either write in the names yourself or use computer generated fonts. If your child is learning how to write and is willing, have them write in the names. A child’s handwriting works well with this card.


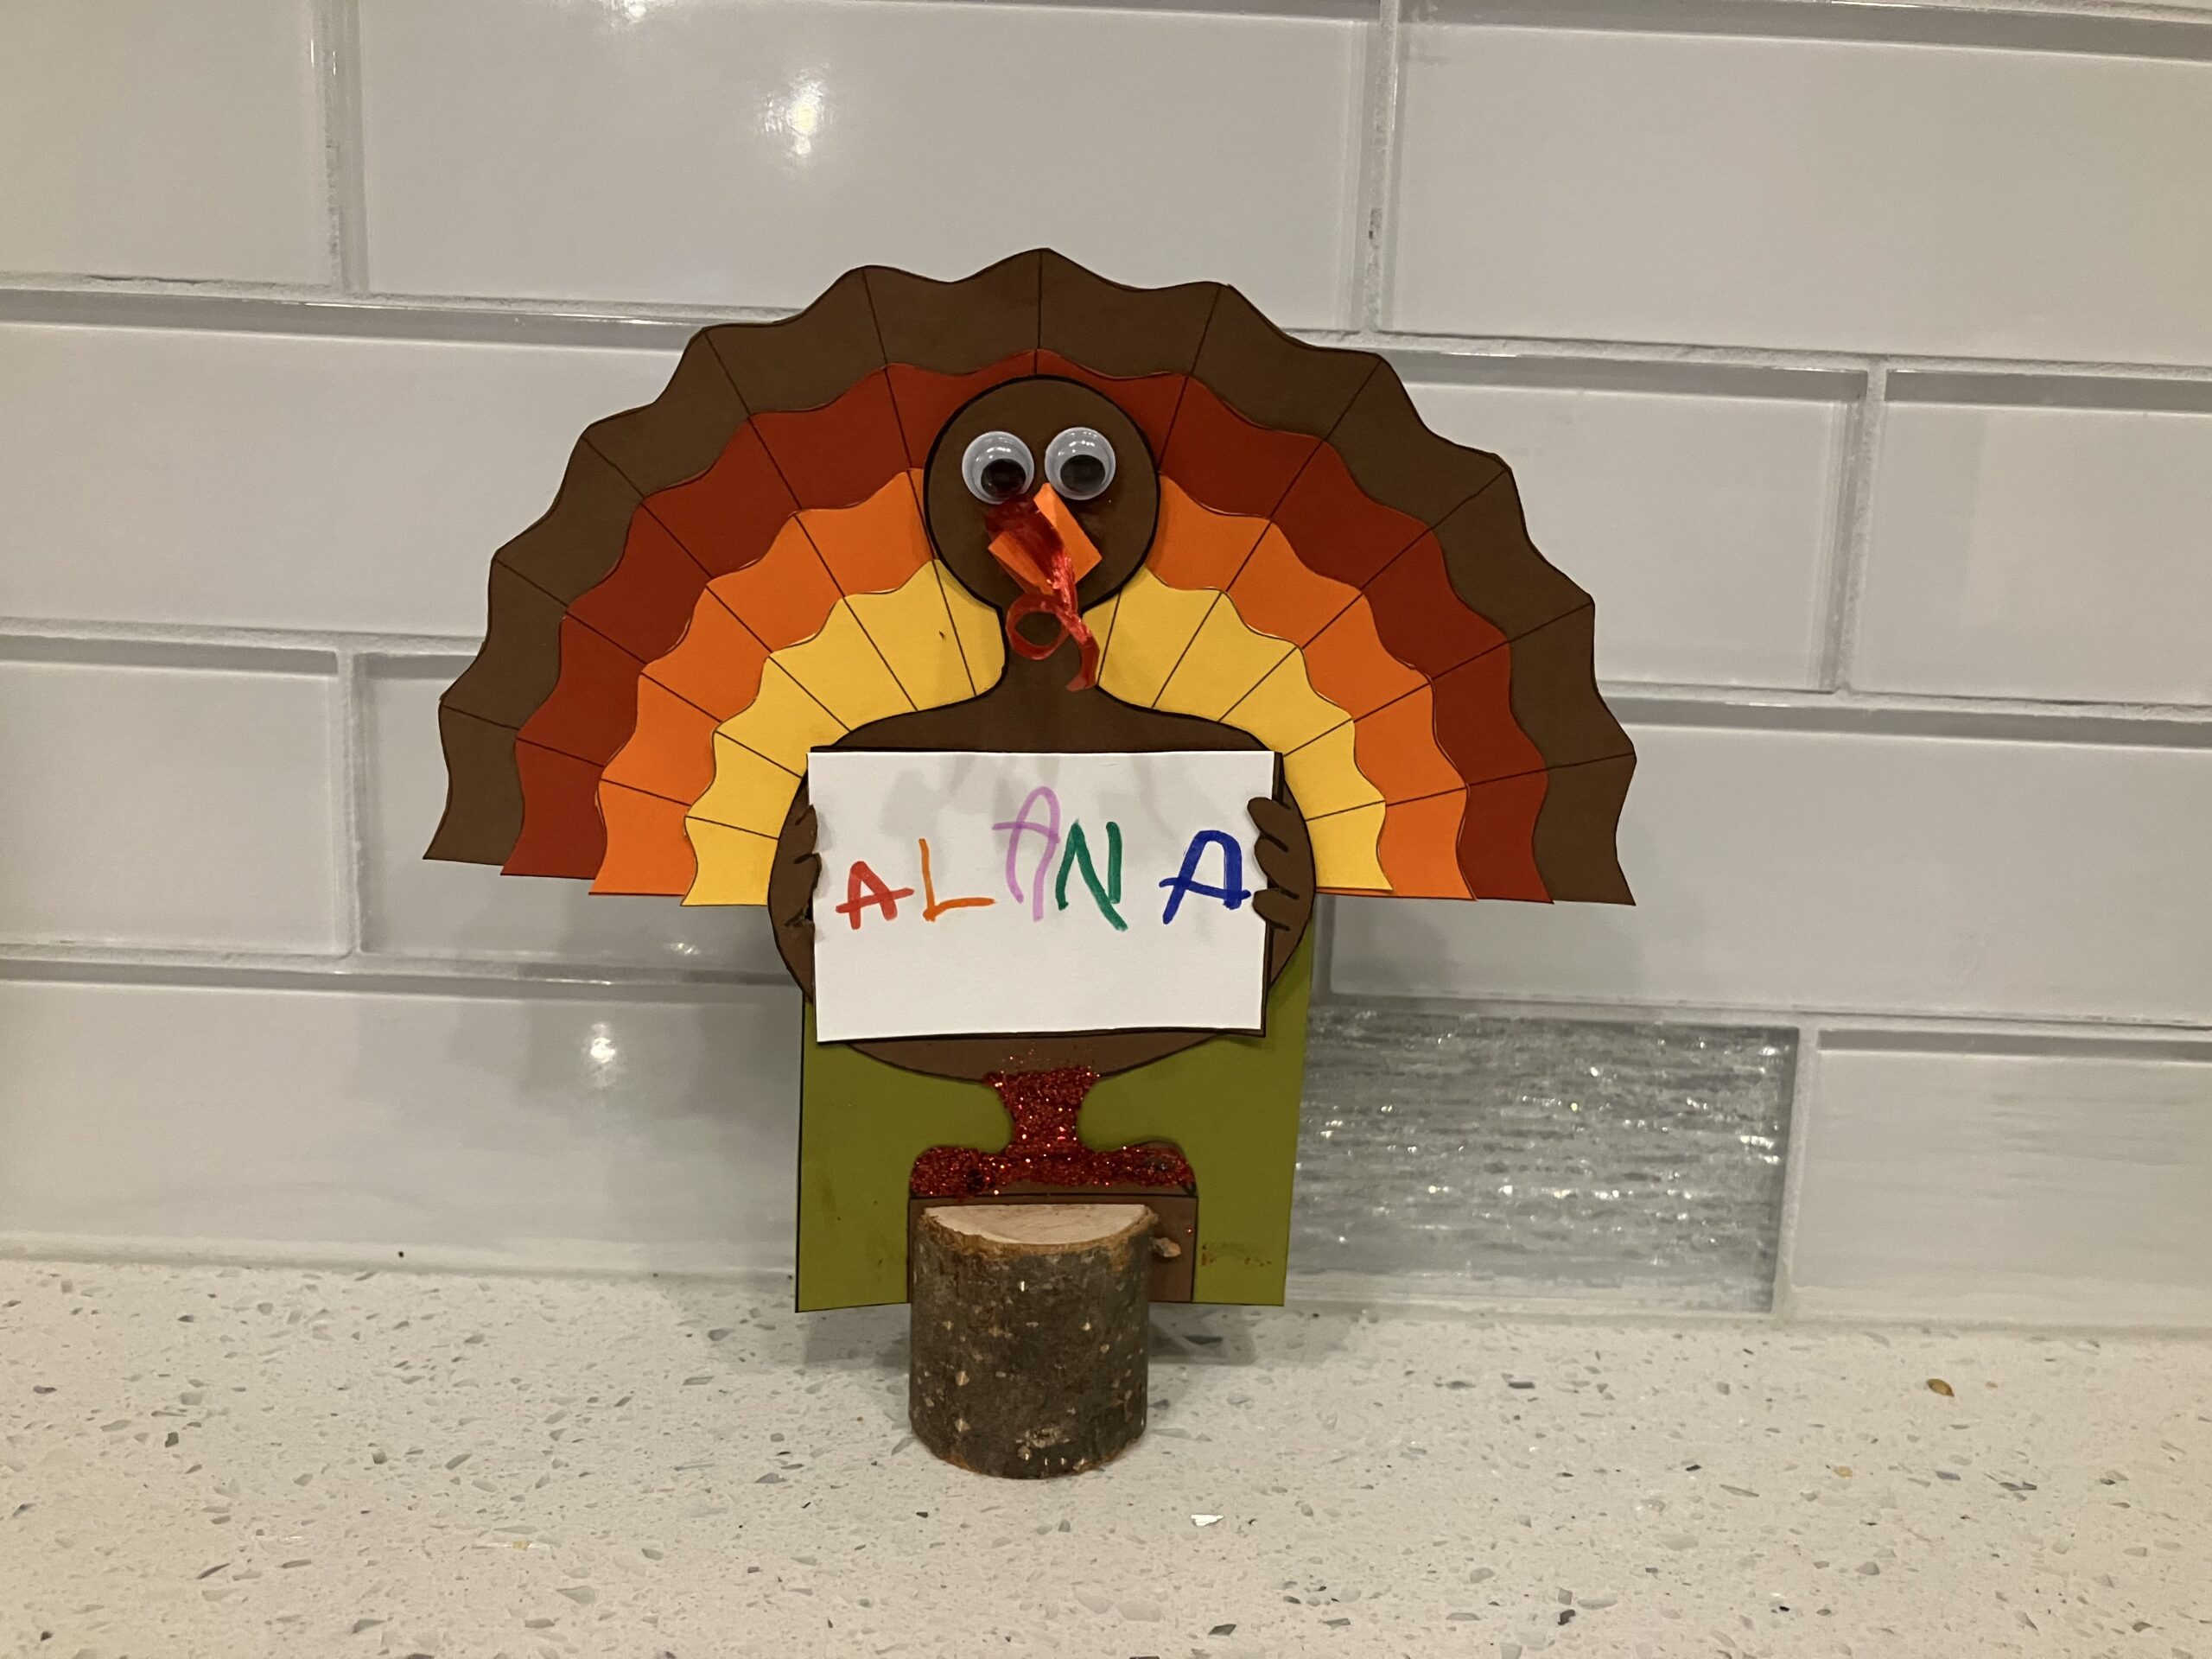
Step 4. Assemble
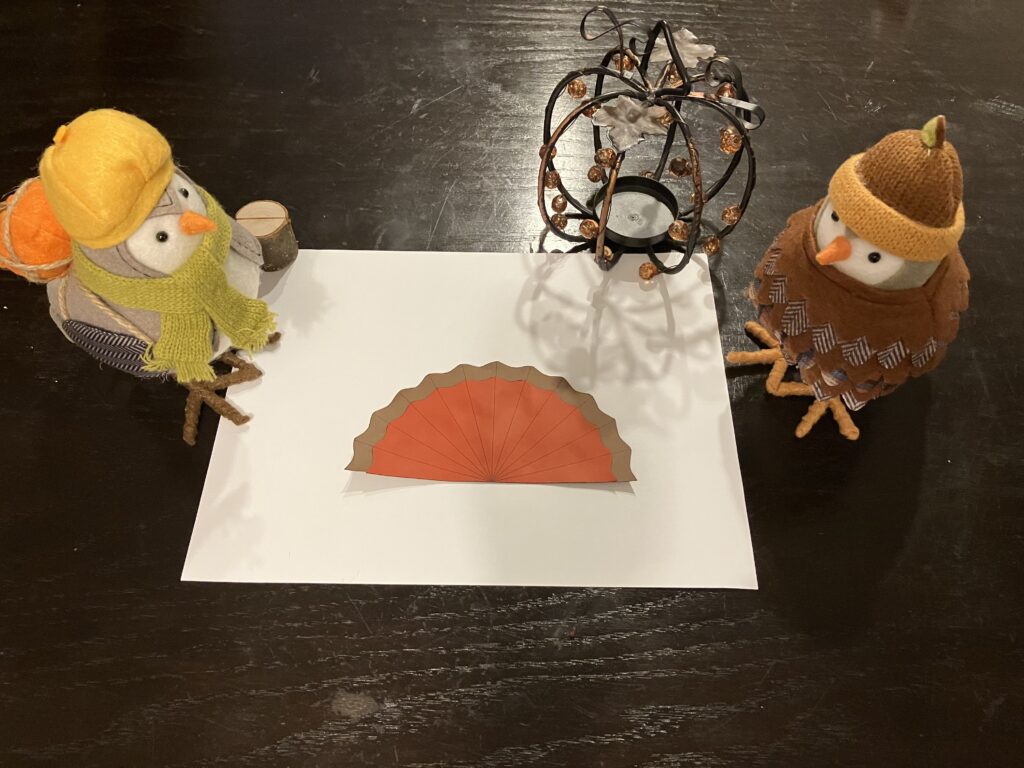
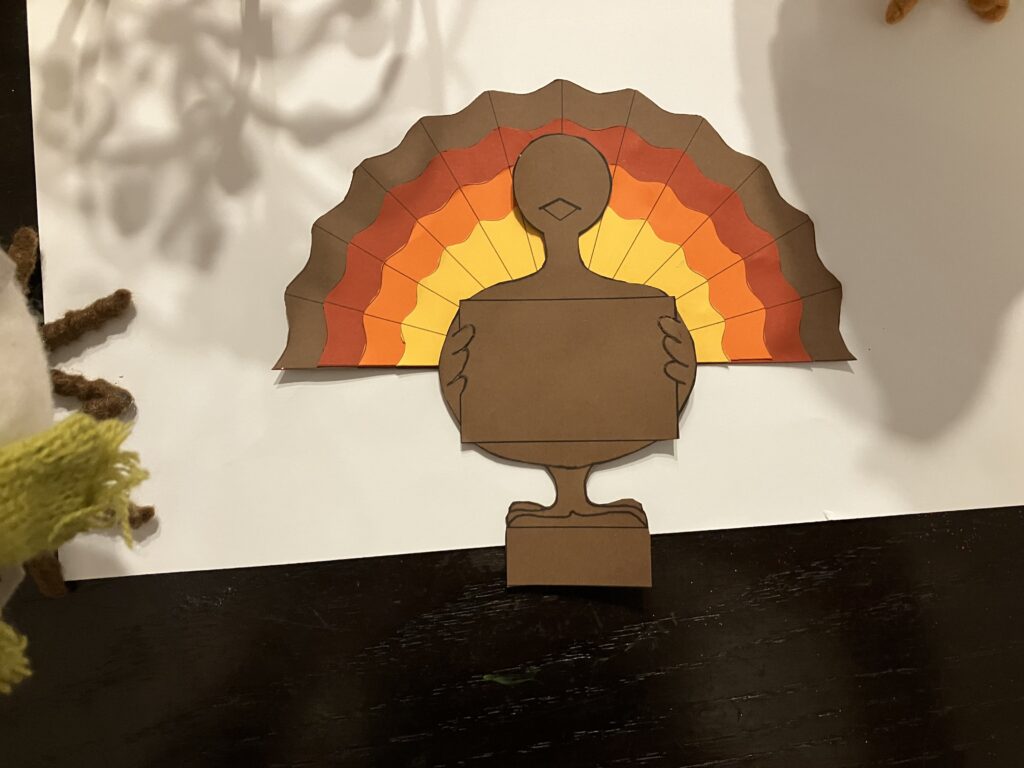
Nest, we are ready to assemble. Start with the brown and red feathers. Glue the red wings to the brown wings by aligning the radial lines and center points. Add the orange wing and yellow wing. Again, align the radial lines for correct spacing.
After the wings are assembled, place glue on the upper half of the turkey and glue the turkey on top of the wings.
Now, you will need to fold the orange beaks along the dotted lines. Fold so the dotted lines are on the inside of the folds. This is for the turkey beak.
Place glue on the outside of the two smaller folded triangular pieces (the other side of dotted lines). Attach to the turkey.
Cut a 1 ½” of string and curl at the ends. Glue string to one side of the beak and pull over to the other side. Add the googly eyes by gluing them in place.
Glue the back of the name card and slide them between the fingers.
Last step is to add glue to the turkey feet and then add glitter on top.
My daughter made me add eyelashes to hers.
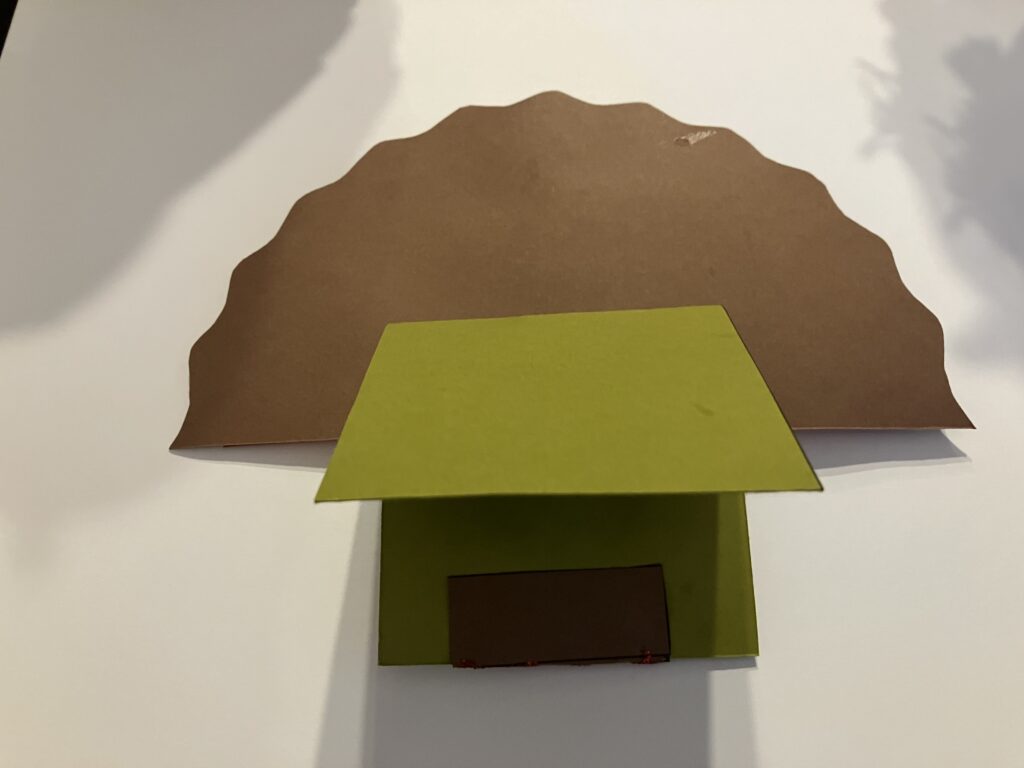
Step 5. Placement
Finally, attach the turkey to a folded index card. If you are not using a place card holder, fold the rectangular block at the bottom of the turkey so the turkey feet align with bottom of card.
I used the green paper in the package. This card gives it support and is required with or without card holder.
Options: Decorate the support card with leaves. Draw in grass or flowers or add leaves.